
JAVA自动化之Junit单元测试框架详解
1、Junit是什么?Junit是一个Java编程语言的开源测试框架,用于编写和运行测试。2、Maven配置?
一、JUnit概述&配置
1、Junit是什么?
Junit是一个Java 编程语言的开源测试框架,用于编写和运行测试。官网 地址:https://junit.org/junit4/
2、Maven配置
-
?xml version="1.0" encoding="UTF-8"?> -
<project xmlns="http://maven.apache.org/POM/4.0.0" xmlns:xsi="http://www.w3.org/2001/XMLSchema-instance" -
xsi:schemaLocation="http://maven.apache.org/POM/4.0.0 http://maven.apache.org/xsd/maven-4.0.0.xsd"> -
<modelVersion>4.0.0</modelVersion> -
<groupId>junit</groupId> -
<artifactId>junitTest</artifactId> -
<version>0.0.1-SNAPSHOT</version> -
<packaging>pom</packaging> -
<!-- https://mvnrepository.com/artifact/junit/junit --> -
<dependencies> -
<dependency> -
<groupId>junit</groupId> -
<artifactId>junit</artifactId> -
<version>4.12</version> -
</dependency> -
</dependencies> -
</project>
二、Assertions 断言
JUnit提供了一些辅助的函数,用来判断被测试的方法是否如我们预期的效果一样正常执行。这些辅助函数被称之为断言。
常用断言:
| 方法 | 示例 | 功能 |
|---|---|---|
| assertArrayEquals | assertArrayEquals("message", expected, actual); | 判断两个数组是否相等 |
| assertEquals | assertEquals("message", "text", "text"); | 判断两个对象是否相等 |
| assertFalse | assertFalse("failure - should be false", false); | 判断表达式是否为false |
| testAssertTrue | assertTrue("failure - should be true", true); | 判断表达式是否为true |
| assertNotNull | assertNotNull("should not be null", new Object()); | 判断是否非空 |
| assertNull | assertNull("should be null", null); | 判断是否为空 |
| assertNotSame | assertNotSame("should not be same Object", new Object(), new Object()); | 判断是否为不同对象 |
| assertSame | assertSame("should be same", aNumber, aNumber); | 判断是否为同一对象 |
| ...... | ...... | ...... |
三、Test Runners 测试运行器
JUnit中所有的测试方法都是由测试运行器负责执行。当一个类被@RunWith注释或拓展了一个@RunWith注释的类,JUnit将会使用引用的类来执行测试,而不是使用JUnit内置的运行器。
org.junit.runner.JUnitCore.runClasses(TestClass1.class, ...);
Specialized Runners:
Suite:Suite是一个标准的运行器,允许手动构建包含来自许多类的测试集。
Parameterized:Parameterized是一个实现参数化测试的标准运行器。运行参数化测试类时,测试方法和测试数据进行合并来创建测试实例。
Categories:Categories运行器来制定分类,定义测试被包含或排除。
四、Aggregating tests in suites 套件
测试套件用于捆绑几个单元测试用例并且一起执行他们,使用@RunWith 和 @Suite 注解。
-
@RunWith(Suite.class) -
@Suite.SuiteClasses({AssertTests.class, CalculatorTest.class}) -
public class SuiteTest { -
// the class remains empty, used only as a holder for the above annotations -
}
五、Test execution order 执行顺序
要改变测试执行的顺序只需要在测试类上使用 @FixMethodOrder注解,并指定一个可用的MethodSorter即可:
@FixMethodOrder(MethodSorters.DEFAULT):JUnit默认使用一个确定的,但不可预测的顺序
@FixMethodOrder(MethodSorters.JVM): 保留测试方法的执行顺序为JVM返回的顺序,每次测试的执行顺序有可能会所不同
@FixMethodOrder(MethodSorters.NAME_ASCENDING):根据测试方法的方法名排序,按照词典排序规则(ASC从小到大递增)
-
@FixMethodOrder(MethodSorters.NAME_ASCENDING) -
public class ExecutionOrderTest { -
@Test -
public void testB() { -
System.out.println("second"); -
} -
@Test -
public void testA() { -
System.out.println("first"); -
} -
@Test -
public void testC() { -
System.out.println("third"); -
} -
}
运行结果:
-
first -
second -
third
六、Expected Exceptions 异常测试
用于测试某一方法是否抛出了正确的异常。
1、@Test(expected=xxx)方式:当抛出的异常与expected参数指定的异常相同时,测试通过。
2、try...fail...catch...方式:捕捉具体待测语句的异常信息并断言,当没有异常被抛出的时候fail方法会被调用,输出测试失败的信息。
3、ExpectedException Rule方式:使用Rule标记来指定一个ExpectedException,并在测试相应操作之前指定期望的Exception类型。
-
public class ExpectedExceptionsTest { -
//方法一:@Test(expected=xxx) -
@Test(expected = IndexOutOfBoundsException.class) -
public void empty() { -
new ArrayList<Object>().get(0); -
} -
//方法二:try...fail...catch... 当没有异常被抛出的时候fail方法会被调用,输出测试失败的信息。 -
@Test -
public void testExceptionMessage() { -
try { -
new ArrayList<Object>().get(0); -
fail("Expected an IndexOutOfBoundsException to be thrown"); -
} catch (IndexOutOfBoundsException anIndexOutOfBoundsException) { -
assertThat(anIndexOutOfBoundsException.getMessage(), is("Index: 0, Size: 0")); -
} -
} -
//方法三:在测试之前使用Rule标记来指定一个ExpectedException,并在测试相应操作之前指定期望的Exception类型(如IndexOutOfBoundException.class) -
@Rule -
public ExpectedException thrown = ExpectedException.none(); -
@Test -
public void shouldTestExceptionMessage() throws IndexOutOfBoundsException { -
List<Object> list = new ArrayList<Object>(); -
thrown.expect(IndexOutOfBoundsException.class); -
thrown.expectMessage("Index: 0, Size: 0"); -
list.get(0); -
} -
}
七、Matchers and assertThat
JUnit4.4引入了Hamcrest框架,Hamcest提供了一套匹配符Matcher,这些匹配符更接近自然语言,可读性高,更加灵活。并且使用全新的断言语法assertThat,结合Hamcrest提供的匹配符,只用这一个方法,就可以实现所有的测试。
assertThat语法:
assertThat(T actual, Matcher matcher);
assertThat(String reason, T actual, Matcher matcher);
其中reason为断言失败时的输出信息,actual为断言的值或对象,matcher为断言的匹配器,里面的逻辑决定了给定的actual对象满不满足断言。
Matchers详见:
http://hamcrest.org/JavaHamcrest/javadoc/1.3/org/hamcrest/Matchers.html
八、Ignoring tests 忽略测试
- 方法用 @Ignore 注解了将不会被执行
- 类用 @Ignore 注解后,其下所有测试方法将不会被执行
-
public class IgnoreTest { -
@Ignore("Test is ignored as a demonstration") -
@Test -
public void testSame() { -
assertThat(1, is(1)); -
} -
}
九、Timeout for tests 超时测试
@Timeout 注解用来测试特定方法的执行时间。如果测试方法的执行时间大于指定的超时参数,测试方法将抛出异常,测试结果为失败。指定的超时参数单位为毫秒。
1、@Test注解上的timeout参数,作用域为方法,单位毫秒
-
@Test(timeout = 2000) -
public void testSleepForTooLong() throws Exception { -
log += "ran1"; -
TimeUnit.SECONDS.sleep(100); // sleep for 100 seconds -
}
2、Timeout Rule,作用域为测试类
-
public class TimeoutTests { -
public static String log; -
private final CountDownLatch latch = new CountDownLatch(1); -
@Rule -
public Timeout globalTimeout = Timeout.seconds(3); // 3 seconds max per method tested -
@Test -
public void testSleepForTooLong() throws Exception { -
log += "ran1"; -
TimeUnit.SECONDS.sleep(100); // sleep for 100 seconds -
} -
@Test -
public void testBlockForever() throws Exception { -
log += "ran2"; -
latch.await(); // will block -
} -
}
十、Parameterized tests 参数化测试
参数化测试允许开发人员使用不同的值反复运行同一个测试。创建参数化测试步骤:
- 用 @RunWith(Parameterized.class) 来注释 test 类。
- 创建一个由 @Parameters 注释的公共的静态方法,它返回一个对象的集合(数组)来作为测试数据集合。
- 创建一个公共的构造函数,接受测试数据。
- 为每一列测试数据创建一个实例变量。
- 用实例变量作为测试数据的来源来创建测试用例。
1、Constructor方式
-
@RunWith(Parameterized.class) -
public class FibonacciTest { -
@Parameters(name = "{index}: fib({0})={1}") -
public static Collection<Object[]> data() { -
return Arrays.asList(new Object[][] { -
{ 0, 0 }, { 1, 1 }, { 2, 1 }, { 3, 2 }, { 4, 3 }, { 5, 5 }, { 6, 8 } -
}); -
} -
private int fInput; -
private int fExpected; -
public FibonacciTest(int input, int expected) { -
this.fInput = input; -
this.fExpected = expected; -
} -
@Test -
public void test() { -
assertEquals(fExpected, Fibonacci.compute(fInput)); -
} -
}
2、Field injection方式
-
@RunWith(Parameterized.class) -
public class FibonacciTest { -
@Parameters(name = "{index}: fib({0})={1}") -
public static Collection<Object[]> data() { -
return Arrays.asList(new Object[][] { -
{ 0, 0 }, { 1, 1 }, { 2, 1 }, { 3, 2 }, { 4, 3 }, { 5, 5 }, { 6, 8 } -
}); -
} -
@Parameter // first data value (0) is default -
public /* NOT private */ int fInput; -
@Parameter(1) -
public /* NOT private */ int fExpected; -
@Test -
public void test() { -
assertEquals(fExpected, Fibonacci.compute(fInput)); -
} -
}
十一、Assumptions with assume 假定测试
使用Assumptions类中的假设方法时,当假设不成立时会报错,但是测试会显示被ignore忽略执行。也就是当一个类中有多个测试方法时,其中一个假设测试方法假设失败,其他的测试方法全部成功,那么该测试类也会显示测试成功。
假设方法适用于:在不影响测试是否成功的结果的情况下根据不同情况执行相关代码。
-
public class AssumptionsTest { -
@Test -
public void testAssumTrue() { -
System.out.println("test"); -
assumeTrue(3>5); -
//该方法中下面所有的代码在上面假设的条件成立后执行 -
//如果上述假设不成立,则会忽略执行该行下面的代码,并报错 -
System.out.println("assume is true!"); -
} -
@Test -
public void testAssumFalse(){ -
assumeFalse(3>5); -
System.out.println("assume is true!"); -
} -
}
以下语法JUnit5支持:
-
@Test -
public void testAssumTrueMessage() { -
assumeTrue(3<5, -
//第二个参数为当第一个参数不成立时,输出的自定义错误信息 -
() -> "Aborting test: not on developer workstation"); -
System.out.println("assume is true!"); -
} -
@Test -
public void testAssumeTrueLambda(){ -
//这个方法的第一个参数为函数式接口,无参数返回值为boolean -
assumeTrue(()->{ -
System.out.println("in assumeTrue"); -
boolean flag = false; -
return flag; -
}); -
System.out.println("out assumeTrue"); -
} -
@Test -
public void testAssumThat() { -
assumingThat(3>5, -
() -> { -
//与上述方法不同的是,仅当前面假设成立时,才会执行这里面的语句 -
//且只会影响到该lambda表达式中的代码 -
assertEquals(2, 2); -
}); -
//此处的断言不受上述assumingThat限制,在所有情况下都会执行 -
System.out.println("no effect"); -
assertEquals("a string", "a string"); -
}
十二、Rules 规则
一个JUnit Rule就是一个实现了TestRule的类,用来在每个测试方法的执行前后执行一些代码。
1、框架自带的Rule
JUnit自带很多已经实现过好了的JUnit Rule,比如Timeout,ExpectedException等等。
2、自定义Rule
自定义一个Rule就是implement一个TestRule interface,实现一个叫apply()的方法。
例:在测试方法运行之前,记录测试方法所在的类名和方法名,然后在测试方法运行之后打印出来。
-
public class MethodNameExample implements TestRule { -
@Override -
public Statement apply(final Statement base, final Description description) { -
return new Statement() { -
@Override -
public void evaluate() throws Throwable { -
//base.evaluate()之前为测试方法运行之前所做操作 -
String className = description.getClassName(); -
String methodName = description.getMethodName(); -
//运行测试方法 -
base.evaluate(); -
//base.evaluate()之后为测试方法运行之后所做操作 -
System.out.println("Class name: "+className +", method name: "+methodName); -
} -
}; -
} -
}
-
public class RuleTest2 { -
@Rule -
public MethodNameExample methodNameExample = new MethodNameExample(); -
@Test -
public void addition_isCorrect() throws Exception { -
assertEquals(4, 2 + 2); -
} -
@Test -
public void mulitiplication_isCorrect() throws Exception { -
assertEquals(4, 2 * 2); -
} -
}
十三、Theories
在参数化测试中,我们需要给定所有具体的测试数据组。而在Theories测试中,用户只需给定了一些数据,JUnit自动利用这些数据组合出各种各种可能的组合来执行测试。
1、内置实现
(1)@DataPoints注解静态变量方式
-
@RunWith(Theories.class) -
public class TheoryTest { -
//允许的最大误差 -
private static final double DELTA = 0.01; -
/*@DataPoints注解静态变量*/ -
@DataPoint -
public static int ZERO = 0; -
@DataPoint -
public static int TWO = 2; -
@DataPoint -
public static int EIGHT = 8; -
//标志这个测试为Theory测试 -
@Theory -
public void testDivide(int dividend, int divisor) { -
//跳过除数为0的case -
assumeThat(divisor, not(0)); -
//Calculator.divide(dividend, divisor)方法返回他们相除的结果 -
assertEquals(dividend / divisor, Calculator.divide(dividend, divisor), DELTA); -
System.out.println("Passed with: dividend=" + dividend + ", divisor=" + divisor); -
} -
}
(2)@DataPoints注解静态方法方式
-
@RunWith(Theories.class) -
public class TheoryTest { -
//允许的最大误差 -
private static final double DELTA = 0.01; -
/*@DataPoints注解一个静态方法*/ -
@DataPoints -
public static int[] getTestData() { -
return new int[]{0, 2, 8}; -
} -
//标志这个测试为Theory测试 -
@Theory -
public void testDivide(int dividend, int divisor) { -
//跳过除数为0的case -
assumeThat(divisor, not(0)); -
//Calculator.divide(dividend, divisor)方法返回他们相除的结果 -
assertEquals(dividend / divisor, Calculator.divide(dividend, divisor), DELTA); -
System.out.println("Passed with: dividend=" + dividend + ", divisor=" + divisor); -
} -
}
@DataPoint用于注解静态变量(或静态方法),表示这个变量是个数据点。当执行testDivide这个Theory测试时,JUnit会把所有的DataPoint数据两两组合,形成一组组的测试数据,并用这些数据分别执行测试。执行上面的测试会输出以下结果:
-
Passed with: dividend=0, divisor=2 -
Passed with: dividend=0, divisor=8 -
Passed with: dividend=2, divisor=2 -
Passed with: dividend=2, divisor=8 -
Passed with: dividend=8, divisor=2 -
Passed with: dividend=8, divisor=8
(3)如果需要限定某个参数,可以使用@TestOn注解
-
import org.junit.experimental.theories.Theories; -
import org.junit.experimental.theories.Theory; -
import org.junit.experimental.theories.suppliers.TestedOn; -
import org.junit.runner.RunWith; -
import static org.junit.Assert.assertEquals; -
@RunWith(Theories.class) -
public class TheoryTest { -
//允许的最大误差 -
private static final double DELTA = 0.01; -
//如果需要限定某个参数,可以使用@TestOn注解 -
@Theory -
public void testDivide2( -
@TestedOn(ints = {0, 2, 8}) int dividend, -
@TestedOn(ints = {2, 8}) int divisor -
) { -
assertEquals(dividend / divisor, Calculator.divide(dividend, divisor), DELTA); -
System.out.println("Passed with: dividend=" + dividend + ", divisor=" + divisor); -
} -
}
2、自定义实现
JUnit默认只提供了一个int型的简单 Parameter Supplier 实现,而Theory机制真正的价值在于,能参考@TestedOn的做法,相对简单的完全自定义出可重用 Parameter Supplier,适应于各种复杂要求的限定范围参数值测试场景,满足开发者所需的高度动态自定义范围取值自动化测试,同时保留与一般@Test相同的强大兼容性。
例:
(1)定义annotation注解接口Between
-
@Retention(RetentionPolicy.RUNTIME) -
// 声明注解接口所使用的委托处理类 -
@ParametersSuppliedBy(BetweenSupplier.class) -
public @interface Between{ -
// 声明所有可用参数,效果为 @Between([first = int,] last = int) -
int first() default 0; // 声明默认值 -
int last(); -
}
(2)定义委托处理类 BetweenSupplier
-
public class BetweenSupplier extends ParameterSupplier { -
@Override -
public List<PotentialAssignment> getValueSources(ParameterSignature sig) { -
// 自定义实参值列表 -
List<PotentialAssignment> list = new ArrayList<PotentialAssignment>(); -
// 获取注解变量 -
Between between = sig.getAnnotation(Between.class); -
// 获取通过注解@Between传入的first值 -
int first = between.first(); -
// 获取通过注解@Between传入的last值 -
int last = between.last(); -
for (int i = first; i <= last; i++) { -
// PotentialAssignment.forValue(String name, Object value) -
// name为value的描述标记,没实际作用 -
// value为实参可选值 -
list.add(PotentialAssignment.forValue("name", i)); -
} -
return list; -
} -
}
(3)调用方式
-
@RunWith(Theories.class) -
public class TheoryDefinedTest { -
@Theory -
public final void test(@Between(last = 0) int i, @Between(first = 3, last= 10) int j) { -
// i 取值为 0(first默认=0,last=0),j 取值为 3-10 -
System.out.println("i="+i+" j="+j); -
} -
}
(4)运行结果
i=0 j=3
-
i=0 j=4 -
i=0 j=5 -
i=0 j=6 -
i=0 j=7 -
i=0 j=8 -
i=0 j=9 -
i=0 j=10
十四、Test fixtures
Test Fixture是指一个测试运行所需的固定环境,也是就是测试运行之前所需的稳定的、公共的可重复的运行环境,这个“环境”不仅可以是数据,也可以指对被测软件的准备,例如实例化被测方法所依赖的类、加载数据库等等。
- @Before - 在每个@Test方法之前运行
- @After - 在每个@Test方法之后运行
- @BeforeClass - 在所有的@Test方法之前运行一次
- @AfterClass - 在所有的@Test方之后运行一次
注:
1、如果创建一个子类继承有fixture注解的父类,那么子类中的@Before方法会在测试方法之前、父类的@Before执行之后执行。
2、如果@Before方法里抛出了异常,@Test方法会跳过,但是@After还是会执行
3、每个测试方法都会在单独的测试类的实例里面运行,@BeforeClass在测试实例创建之前执行
-
public class FixtureTest { -
private static int quantity = 0; -
public FixtureTest() { -
quantity++; -
} -
@BeforeClass -
public static void breforeTestOnlyOnce() throws Exception { -
System.out.println("Run before all test only once..."+ quantity); -
} -
@AfterClass -
public static void afterTestOnlyOnce() throws Exception { -
System.out.println("Run after all test only once..."+ quantity); -
} -
@Before -
public void beforePerTest() { -
System.out.println("Run before per test ..."+ quantity); -
} -
@After -
public void afterPerTest() { -
System.out.println("Run after per test ..."+ quantity); -
} -
//Test Method -
@Test -
public void testOne() { -
System.out.println("testOne Start..."+ quantity); -
} -
@Test -
public void testTwo() { -
System.out.println("testTwo Start..."+ quantity); -
} -
}
运行结果:
-
Run before all test only once...0 -
Run before per test ...1 -
testOne Start...1 -
Run after per test ...1 -
Run before per test ...2 -
testTwo Start...2 -
Run after per test ...2 -
Run after all test only once...2
十五、Categories 用例分类
category 和 testSuite的比较:testSuite是类级分组(xx.class),category是用例级分组(@Test),category是testSuite的升级
category使用步骤:
1、创建好测试类,及测试类中的测试用例
2、创建接口:按用例的分组来创建
3、@Category注解:将用例用@Category注解分组
4、创建类来执行这些分组的类
-
public interface FastTests { /* category marker */ } -
public interface SlowTests { /* category marker */ } -
public class A { -
@Test -
public void a() { -
fail(); -
} -
@Category(SlowTests.class) -
@Test -
public void b() { -
} -
} -
@Category({SlowTests.class, FastTests.class}) -
public class B { -
@Test -
public void c() { -
} -
} -
@RunWith(Categories.class) -
@IncludeCategory(SlowTests.class) -
@SuiteClasses( { A.class, B.class }) // Note that Categories is a kind of Suite -
public class SlowTestSuite { -
// Will run A.b and B.c, but not A.a -
} -
@RunWith(Categories.class) -
@IncludeCategory(SlowTests.class) -
@ExcludeCategory(FastTests.class) -
@SuiteClasses( { A.class, B.class }) // Note that Categories is a kind of Suite -
public class SlowTestSuite { -
// Will run A.b, but not A.a or B.c -
}
十六、总结
总结:
感谢每一个认真阅读我文章的人!!!
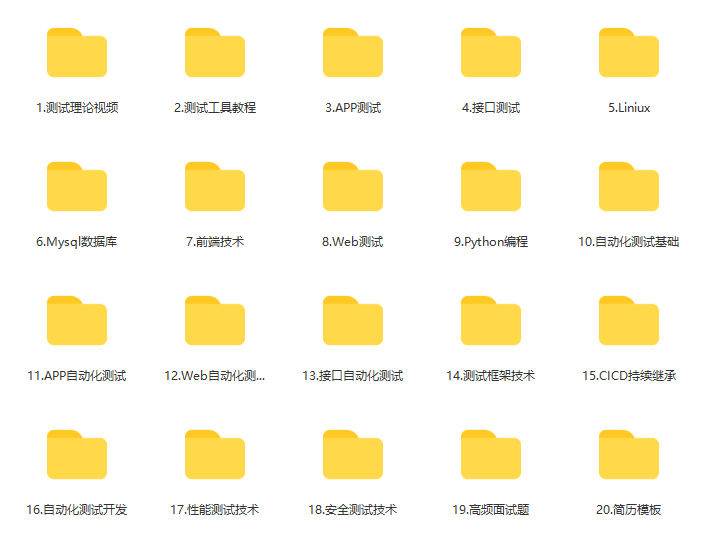
作为一位过来人也是希望大家少走一些弯路,如果你不想再体验一次学习时找不到资料,没人解答问题,坚持几天便放弃的感受的话,在这里我给大家分享一些自动化测试的学习资源,希望能给你前进的路上带来帮助。
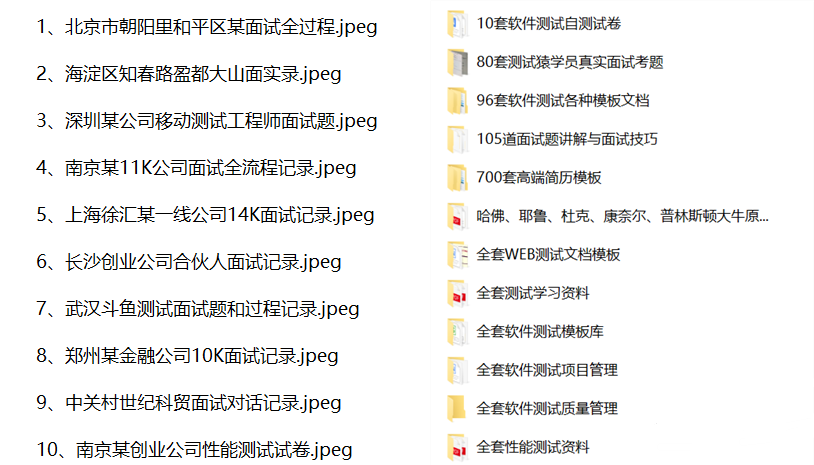
软件测试面试文档
我们学习必然是为了找到高薪的工作,下面这些面试题是来自阿里、腾讯、字节等一线互联网大厂最新的面试资料,并且有字节大佬给出了权威的解答,刷完这一套面试资料相信大家都能找到满意的工作。
视频文档获取方式:
这份文档和视频资料,对于想从事【软件测试】的朋友来说应该是最全面最完整的备战仓库,这个仓库也陪伴我走过了最艰难的路程,希望也能帮助到你!以上均可以分享,点下方小卡片即可自行领取。

一站式 AI 云服务平台
更多推荐


 23
23 0
0- 0


 已为社区贡献22条内容

所有评论(0)