
ubuntu中解决Failed to connect to 127.0.0.1 port xxxxx: Connection refused
查看系统环境有没有使用代理。有就取消,没有就换一种方法。如果有相应的代理存在就取消掉。代理,在设置中取消代理。
ubuntu中解决Failed to connect to 127.0.0.1 port xxxxx: Connection refused
方法一
查看一下代理
-
git config --global http.proxy -
git config --global https.proxy
有就取消,没有就换一种方法
-
git config --global --unset http.proxy -
git config --global --unset https.proxy
方法二
查看系统环境有没有使用代理
env|grep -I proxy
出现以下类似的配置
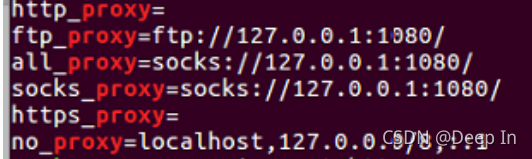
如果有相应的代理存在就取消掉
-
unset http_proxy -
unset https_proxy
方法三
手动操作ubuntu代理,在设置中取消代理。
配置代理服务器并单击“确定(OK)”保存。
参考:在CentOS 7操作系统上安装及设置Squid代理的过程。
在CLI上设置系统范围的Proxy(代理)设置
我们将在/etc/profile.d/proxy.sh下添加一个shell脚本文件,这将确保设置适用于所有已登录的用户:
sudo nano /etc/profile.d/proxy.sh
参考:nano命令_Linux nano命令使用详解:字符终端文本编辑器。
填入代理值,通过profie.d设置代理配置:
# set proxy config via profie.d - should apply for all users
#
export http_proxy="http://10.10.1.10:8080/"
export https_proxy="http://10.10.1.10:8080/"
export ftp_proxy="http://10.10.1.10:8080/"
export no_proxy="127.0.0.1,localhost"
# For curl
export HTTP_PROXY="http://10.10.1.10:8080/"
export HTTPS_PROXY="http://10.10.1.10:8080/"
export FTP_PROXY="http://10.10.1.10:8080/"
export NO_PROXY="127.0.0.1,localhost"
将要从代理中排除的其他IP添加到NO_PROXY和no_proxy环境变量中。
让它可执行:
sudo chmod +x /etc/profile.d/proxy.sh
源文件以开始使用代理设置,或者注销并重新登录:
$ source /etc/profile.d/proxy.sh
确认:
$ env | grep -i proxy
为APT包管理器设置Proxy(代理)
以上设置适用于应用程序和命令行工具,如果只想为APT包管理器设置代理,请进行如下配置:
$ sudo nano /etc/apt/apt.conf.d/80proxy
Acquire::http::proxy "http://10.10.1.10:8080/";
Acquire::https::proxy "https://10.10.1.10:8080/";
Acquire::ftp::proxy "ftp://10.10.1.10:8080/";
将10.10.1.10替换为代理服务器的正确IP地址,如果需要身份验证,请设置如下:
Acquire::http::proxy "http://<username>:<password>@<proxy>:<port>/";
Acquire::https::proxy "https://<username>:<password>@<proxy>:<port>/";
Acquire::ftp::proxy "ftp://<username>:<password>@<proxy>:<port>/";
仅为wget设置Proxy(代理)
要设置用于wget命令的代理设置,请将它们添加到~/.wgetrc文件中,要安装wget请参考在Linux系统中安装Wget、Htop、Nano、Lynx、Fzf、Pydf的方法:
$ vim ~/.wgetrc
use_proxy = on
http_proxy = http://10.10.1.10:8080/
https_proxy = http://10.10.1.10:8080/
ftp_proxy = http://10.10.1.10:8080/
结语
以上就是在Debian/Ubuntu服务器或桌面上配置系统范围的代理设置,通常情况下,使用图形操作的方式更简单,更直观。
相关主题

一站式 AI 云服务平台
更多推荐

 1
1 0
0- 0


 已为社区贡献2条内容

所有评论(0)